

All the gamers and PC enthusiasts out there want to make their PC more powerful and the fastest. They are obsessed with getting the best components for their PC. So, most people like to check different things like the processor speed, RAM speed, GPU, and SSD when they are purchasing a computer to ensure the best performance. However, many people still do not know how to check the RAM speed on Windows.
When it comes to getting RAM, 8 GB is sufficient for most people. It helps to play regular games and multitask without any issues. However, you also need to keep in mind that the performance of your computer depends on the RAM. So, you need to choose RAM very carefully. When purchasing RAM, you need to look at the MHz of it. The speed of RAM is measured in MHz, high MHz means more speed.
Methods To Check The RAM Speed
There are mainly three different methods that you can use to check the RAM speed on Windows 10/11. Here are all of them given below in detail to help you check the RAM speed.
Task Manager
This is the easiest option to check the speed of RAM for Windows 10 computers. There are some easy steps that you need to follow to check the speed.
Step 1: First, you have to open the search in Windows and type “Task Manager.” It will open the task manager from the list.
Step 2: You will find a tab “Performance” in task manager. Click on it and check the memory option.
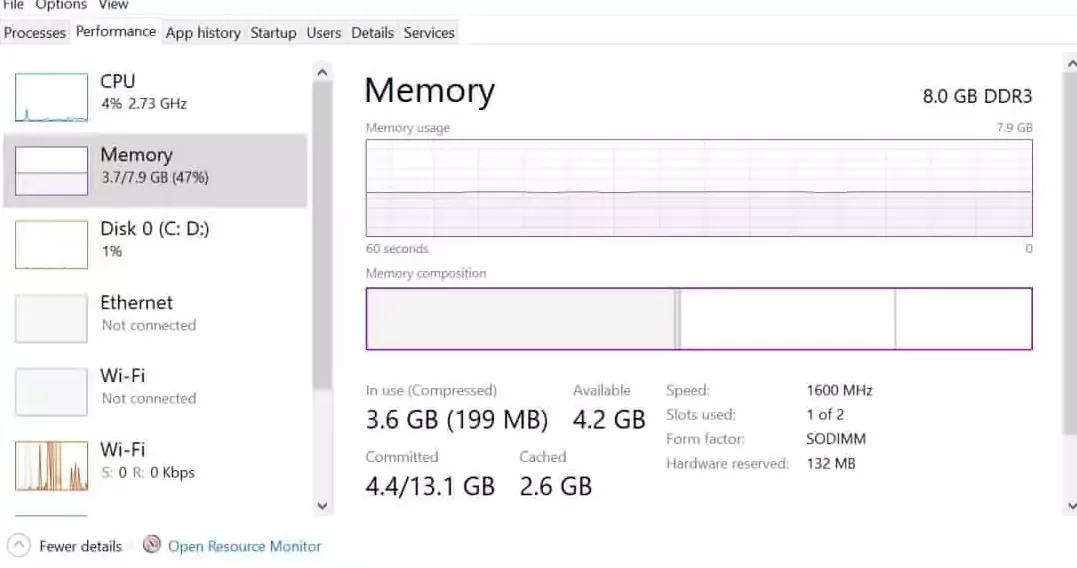
Step 3: After clicking on the memory, check the right side of the screen to find the speed of the RAM.
Following these steps will help you a lot to see the RAM speed of Windows 10 and 11.
Command Prompt
If you do not like the method mentioned above, and looking for other ways, then the command prompt is the best way to do it. Here are some of the steps that you can follow to know the RAM speed.
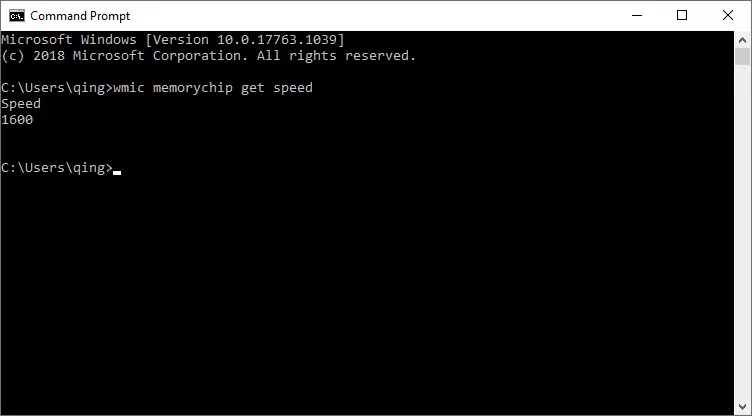
Step 1: Press both R and Windows buttons to open the run dialog box. Type ‘CMD’ in the dialog box and hit the enter button.
Step 2: It will open a command prompt on the PC. Then, you have to type “wmic memorychip get speed” and press enter. You will be able to see the RAM speed in the command window.
Check The RAM Sticker
Last but not least, you can find out the speed of RAM by looking at the sticker. If the other methods are not working, then you will be able to use this option. If the PC is not turning on, then you will need to check the RAM. To do that, opening the PC cabinet is very important.
Every RAM has a sticker on it by the manufacturers. It helps people to know that they are purchasing the right RAM. In this sticker, you will find the RAM speed, size, and other details.
These are some of the best ways that you can use to find out the RAM speed. Now that you know how to check the RAM speed on Windows, make sure to go check the speed of your RAM.
Also Read:
- How to Turn Off Comments on Instagram Posts
- How to Extract Text from any Image on Android, iPhone, Windows, and Mac
- How to Block Ads and Pop-ups on FireStick
- How To Use The Voice Typing feature In Windows 11